Description: A CMA is an online comparative market analysis. You can create comprehensive, informative, personalized, and eye-catching reports for your buyers and sellers.
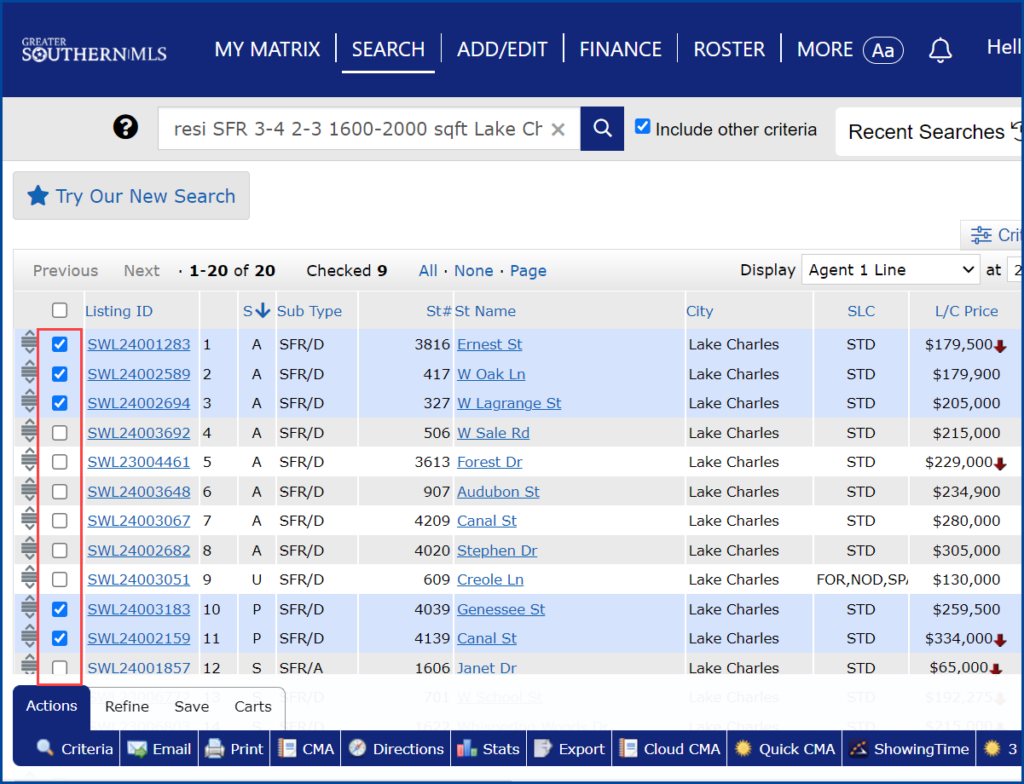
Step 1: Run a search to retrieve the listings you will use as comparables in your CMA. Check the box next to each listing you wish to include in the report.
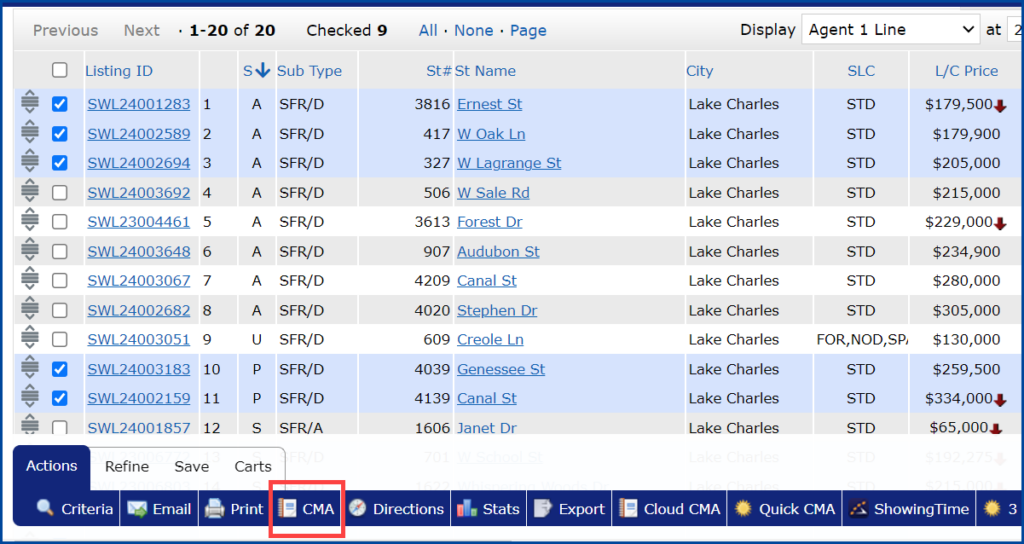
Step 2: Click the CMA button at the bottom of the page. The CMA wizard will start, and you will see the eight sections of the CMA at the top of the page.

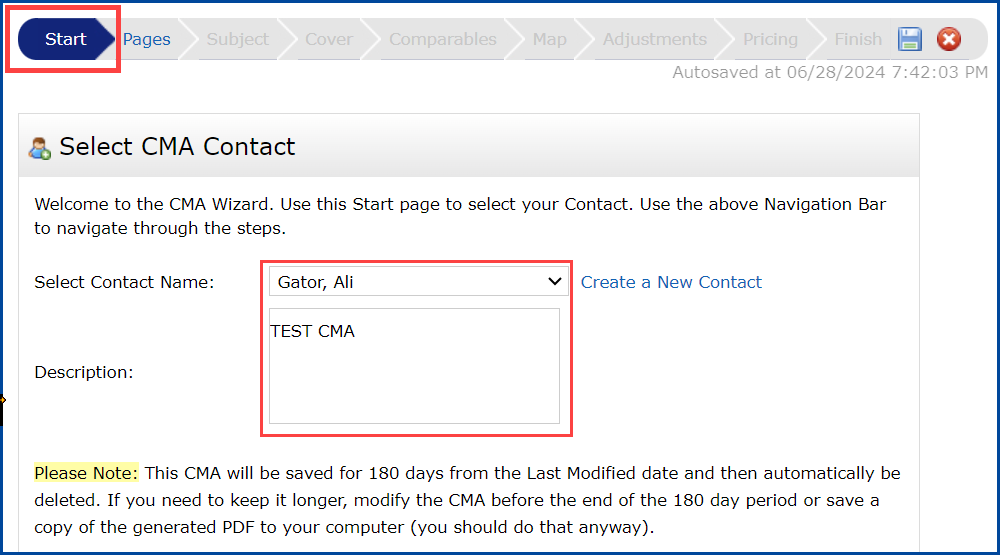
Start: Select Contact Name by using the drop-down menu. Enter your CMA Description.
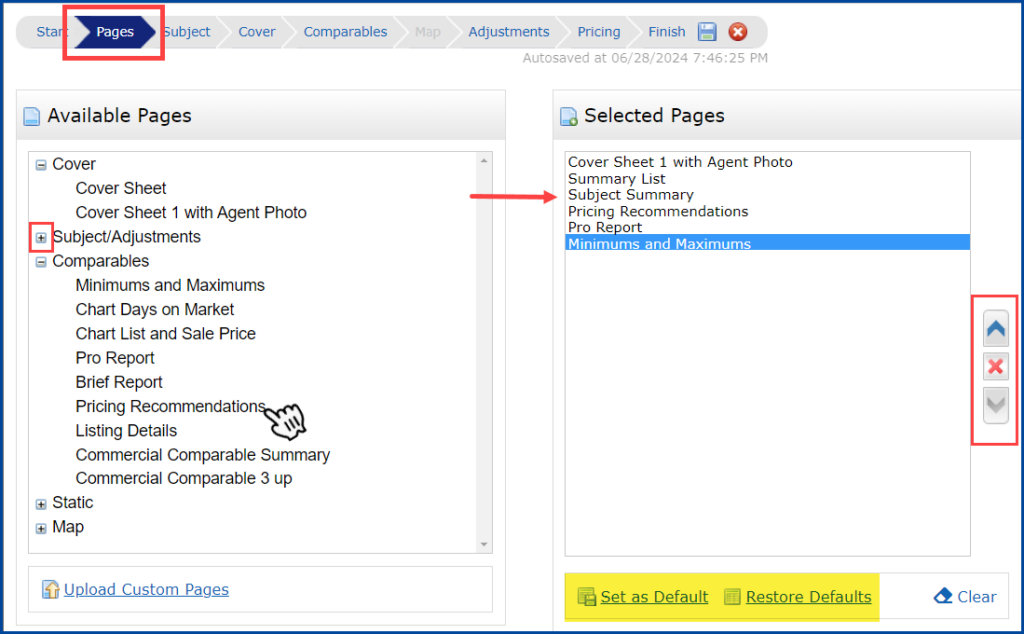
Pages: In the Available Pages box, click the plus sign + next to the section names to expand the sections you wish to include in the report. Clicking an item in the Available Pages category will move it to the Selected Pages category. You may add as many of the available pages as you wish. You may double-click an item in the “Selected Pages” category or click the ![]() icon to the right to remove it. At any time, you may use the up and down arrow buttons to arrange the order of the pages in the report. You may also click the “Set as Default” link at the bottom of the page to set the currently selected pages as the default for that type of listing. Clicking “Restore Defaults” will reset the “Selected Pages” category to none for new CMAs. Clicking “Clear” will empty the “Selected Pages” category.
icon to the right to remove it. At any time, you may use the up and down arrow buttons to arrange the order of the pages in the report. You may also click the “Set as Default” link at the bottom of the page to set the currently selected pages as the default for that type of listing. Clicking “Restore Defaults” will reset the “Selected Pages” category to none for new CMAs. Clicking “Clear” will empty the “Selected Pages” category.
Subject: You may enter the details for the Subject property via several methods.

- Type in the subject property fields manually = will provide a basic list of subject detail fields that you may enter manually, upload a photo, and enter remarks for.
- Enter a Cross Property MLS Number to auto-fill from = Click the “Fill” button after entering the MLS # and the fields will automatically populate.
- Enter the subject property APN to use the tax auto-full option
- Search for the Cross Property listing to auto-fill from = Enter the search criteria for the property you wish to locate then click “Search” at the bottom of the page. Click the check box next to the property you wish to use as your Subject and click “Fill from Selected” at the bottom of the page. You may click “Revise Search” if you did not find the listing you were searching for.
- Search for a tax record to auto-fill from = Search for a property by using the address.
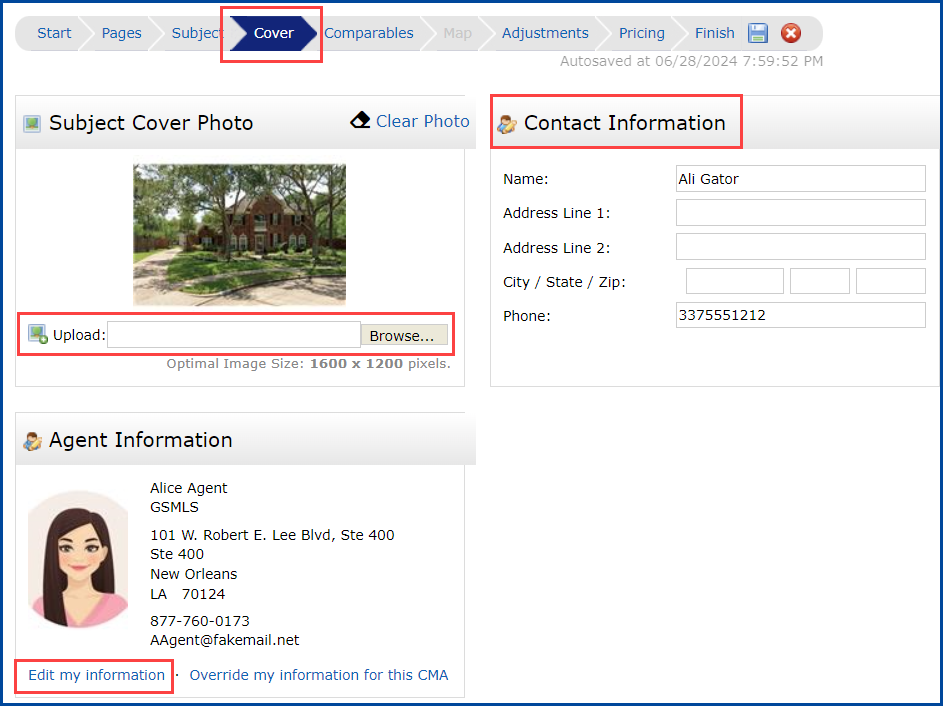
Cover: Contact information is pre-populated from the Contact details you selected in the first tab. Click on Browse to locate an image to use for the Cover photo if you did not include one in the Subject tab. Choose to Edit my Information and update your agent image. You may click “Browse” to locate an image to use on the report in the “Agent Photo/Broker Logo” section. Note: Optimal Size is 80 x 120 pixels. Add the Contact Information.
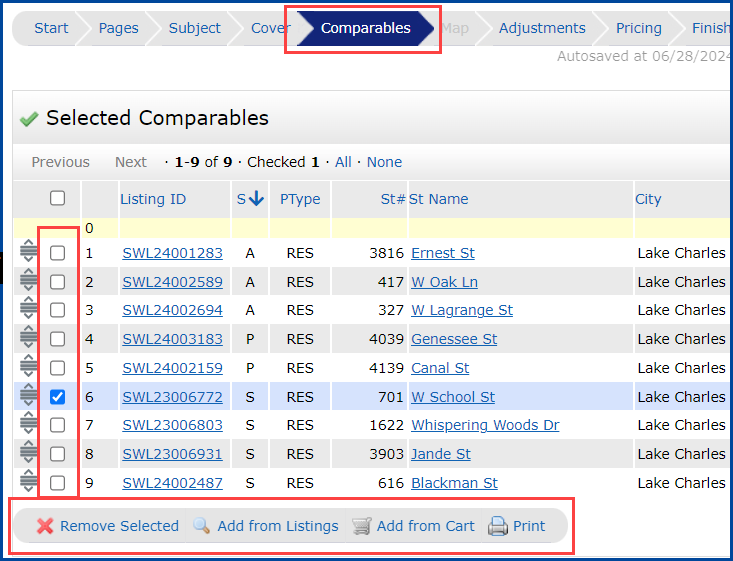
Comparables: Review the listings from the initial search and click the check box to select the individual listings you wish to include as comparables. You may click the check box in the gray header row to select all comparables in the list. Clicking the Remove Selected button will remove those items from the available list. You may also click search for additional comparables by clicking “Add from Listings,” “Add from Tax,” or “Add from Cart” on this page.
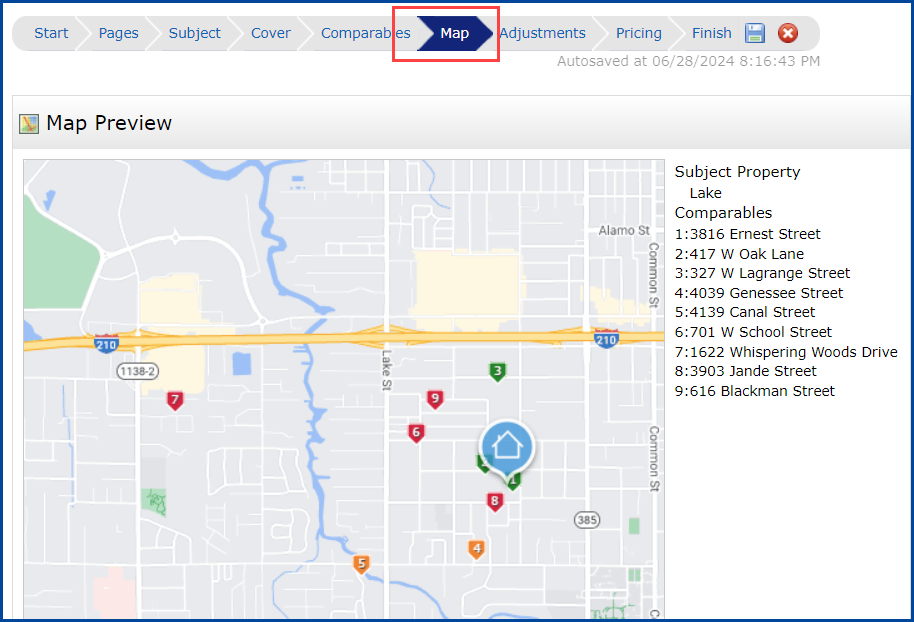
Map: A map will display the subject property and the comparable properties.
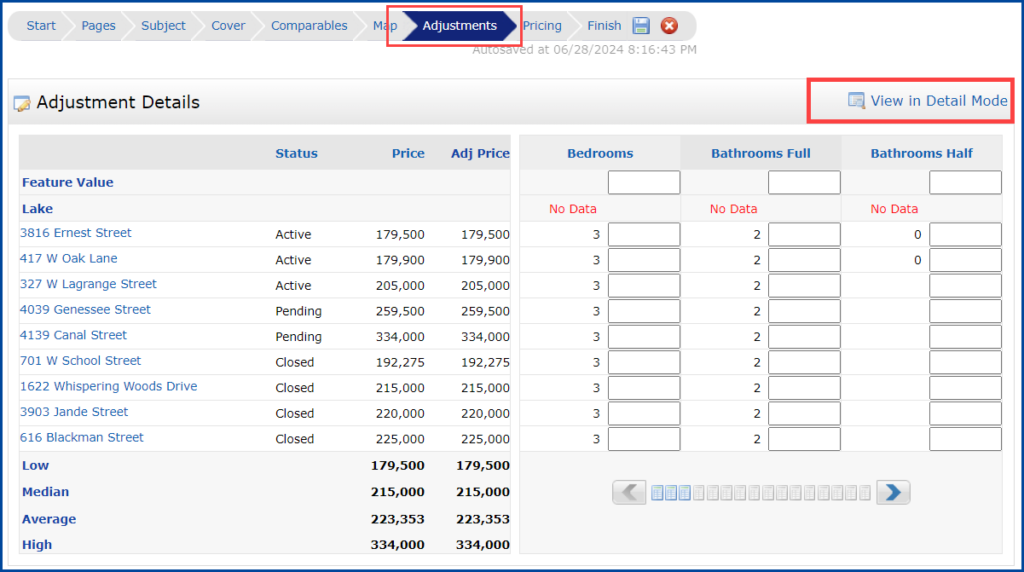
Adjustments: Click any comparable listing address or the View in Detail Mode link for a side-by-side comparison of the subject and adjusting property. In Single Line Mode, use the left and right arrows to navigate to the different fields to enter your adjustments.
Pricing: Summarizes the Comparable and Adjusted Comparable Low/Median and High property values for the report. You may enter your suggested List Price for the contact and any additional notes. You are limited to 250 & 1000 characters, respectively, for those fields.

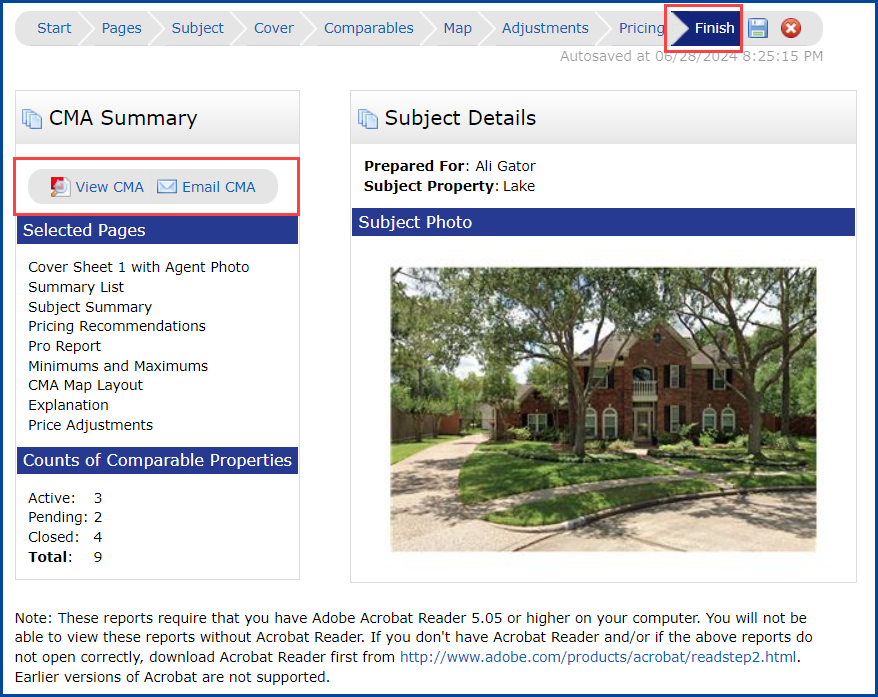
Finish: You may click the “View CMA” button to view the CMA report in PDF format. Note: These reports require that you have Adobe Acrobat Reader 5.05 or higher installed on your device. Click the “Email CMA” button to email the report to your Contact. You may enter a Subject and Body at this point. Click the “Send” link at the top of the page when you are finished.
Save: Click the ![]() icon at the top of the page at any time to save the report. You may find it again under the “My Matrix” > “CMA’s” section. Note: Navigating from one tab to another will automatically save any changes on the tab you are navigating away from.
icon at the top of the page at any time to save the report. You may find it again under the “My Matrix” > “CMA’s” section. Note: Navigating from one tab to another will automatically save any changes on the tab you are navigating away from.

Cancel: Click the ![]() icon at the top of the page to discard any changes to that page and quit the CMA wizard.
icon at the top of the page to discard any changes to that page and quit the CMA wizard.


