You can customize the columns in the Greater Southern MLS Matrix system by adding, removing, and/or rearranging them. You can also change column width, properties, the column name in the Agent 1 Line display, and more.
Change Column Name and Properties #
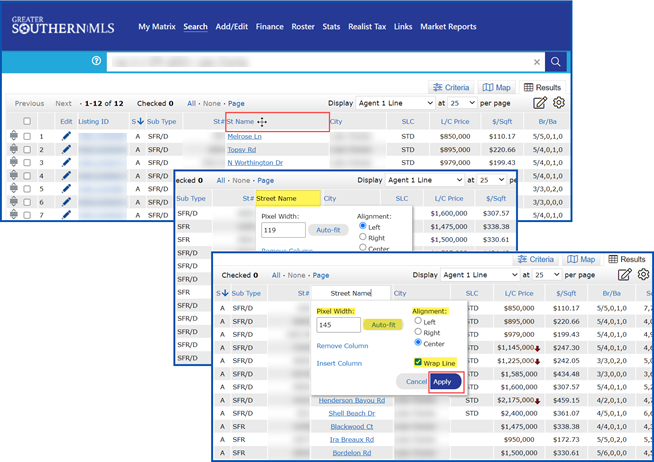
Hover over the column header in the gray bar until you see the cross arrows, then click.
The header will turn white, letting you change the name.
You will see the properties box. From here, you can change or adjust:
- Pixel width: Shows the column’s current width based on how much text can fit on one line. You can type in a different value to make the column wider or narrower.
- Auto-fit: When you select this, it will automatically adjust the column width based on the text length.
- Alignment: Select how the text is aligned: left, right, or center.
- Wrap Line: Text will wrap within the column space if you decrease the column’s width.
Click Apply to save changes.
Add Column #
Hover over the column header in the gray bar until you see the cross-arrows then click.
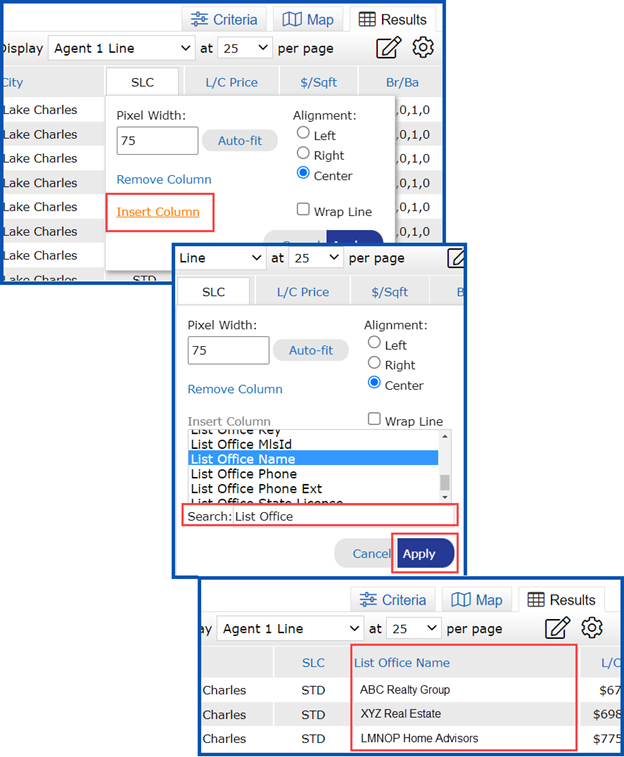
Click Insert Column. A list with all possible column types will appear.
In the Search box,type the column name. For this example, we used List Office.
Select the column you want to insertand click Apply. This will add the column to your Agent 1 line report.
Tip: you can enter the full name of a field to refine the list of field results.
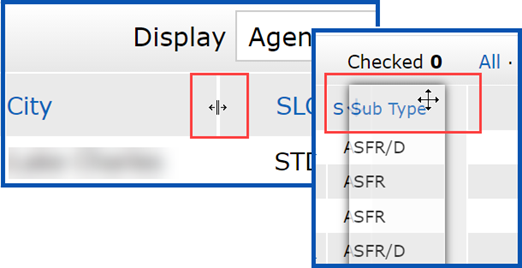
Manually Change Column Width and Position #
To manually change the column width, hover your mouse over the column line until the double bar double arrow appears.
Click, Hold, Drag, and Release to increase or decrease the column width.
To move the column, hover your mouse over the column header until the cross arrows display.
Click, Hold, Drag, and Drop the column into the new position.
Save Changes #
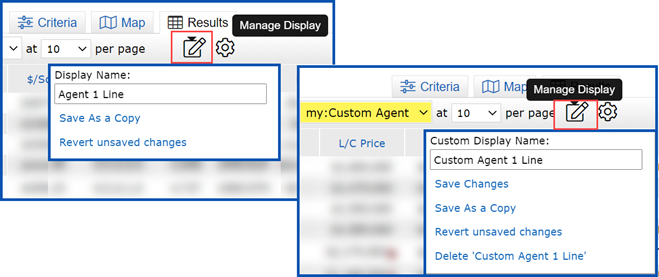
Click on the Pencil icon to access Manage Display.You can change the Display Name or keep it as is, then click Save As a Copy.
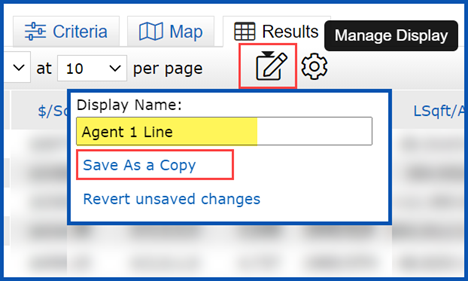
After saving the changes, the Manage Display Pencil will include these options:
- Custom Display Name
- Save Changes
- Save As a Copy
- Revert unsaved changes
- Delete ‘[name of your report]’
Set Default Display #
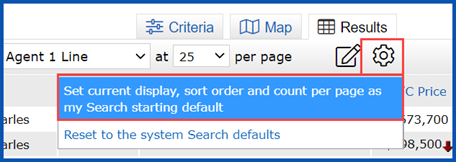
To set this report as your default 1 line display, click the Gear icon.
Select “Set current display, sort order and count per page as my Search starting default” to save as your default display.


