You can create both Comparative Market Analyses (CMAs) and Seller’s Reports within REALTORS®Property Resource (RPR). CMAs and Seller’s Reports are similar, but the amount of information they contain and their purposes differ.
A Comparable Market Analysis (CMA) estimates the value of a specific property by evaluating properties (or “comparables”) that are similar in size, location, condition, and amenities. A Seller’s Report contains even more detailed information for the property, including local market statistics, recent market activity within the subject property zip code, and more. Sometimes a CMA is part of a Seller’s Report.
Creating CMAs & Seller Reports #
To create your CMA or Seller’s Report in RPR, click the REALTORS® Property Resource (RPR) tile on your REcenterhub dashboard.

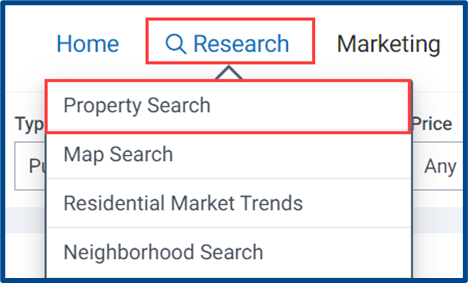
From the RPR homepage, click on Research and then Property Search.
Enter the subject property address in the Location field.
Note: Make sure that the Type/Status and Property Type field are both accurate. These should reflect similarities with the subject property.

Within “Property Information,” click CMA (even if you are creating a Seller’s Report).

Select the Analysis Type and complete the next five steps to create a CMA or Seller’s Report:
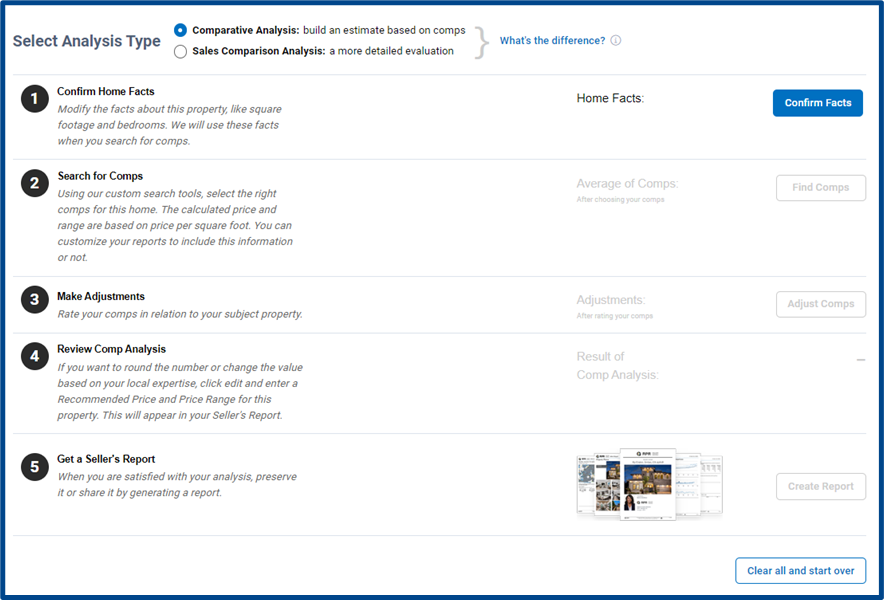
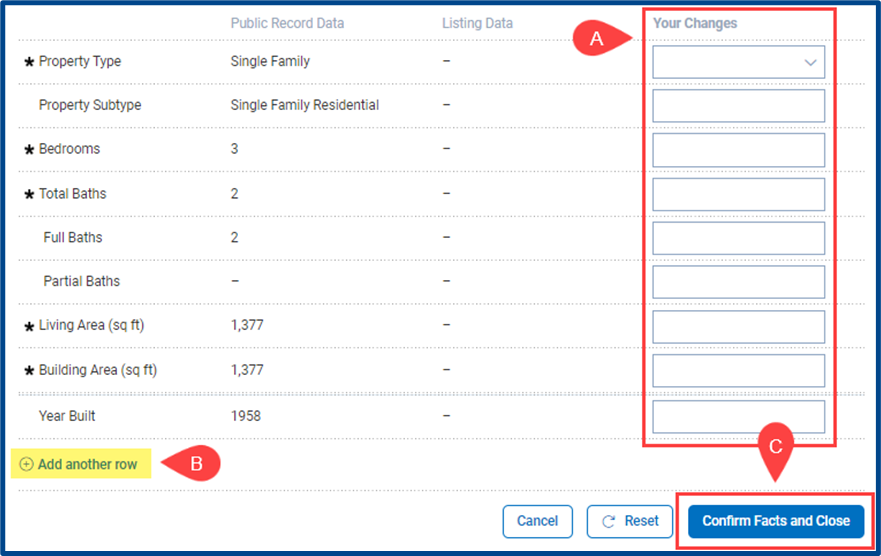
Step 1: Confirm the Home Facts for the subject property.
If you need to modify any property characteristics:
- A. You can manually enter Your Changes through the dropdown on the right.
- B. You can add another row of characteristics to appear in the report.
- C. When finished, select Confirm Facts and Close to save.

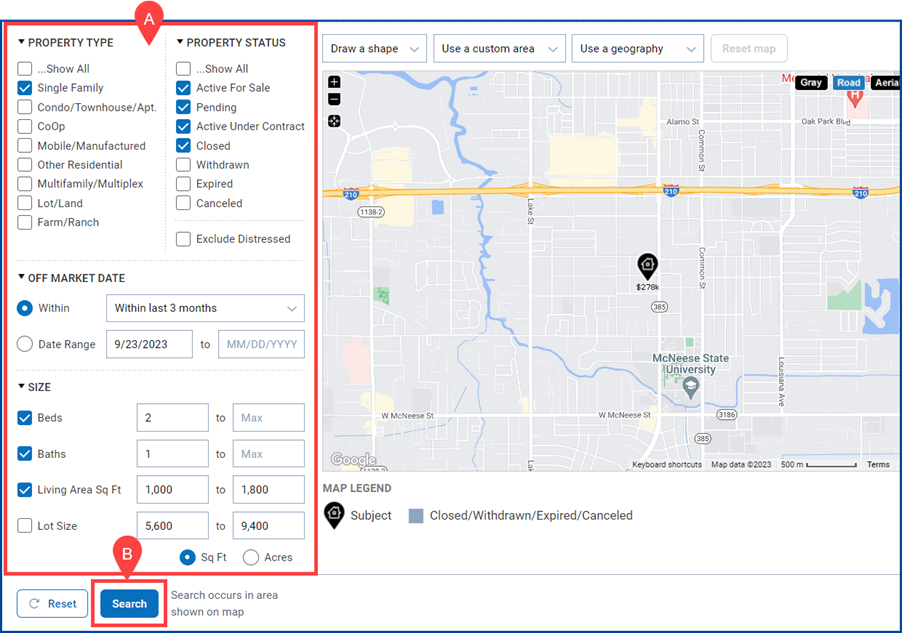
Step 2: Select Find Comps to search for comparables.

- A. If necessary, add relative criteria.
- B. Select Search to find comps.
Note: The search will occur in the area shown on the map.
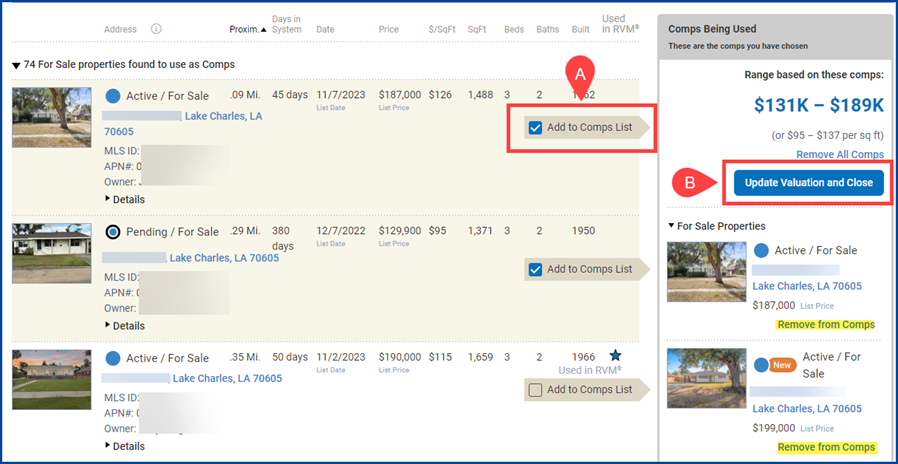
A list of results will display below the map.
- A. Review and select which comps to Add to the Comps List.
- B. Then, select Update Valuation and Close to save.
Note: Remove added properties by selecting “Remove from Comps.”
Step 3: If necessary, adjust the comps. If not, skip and proceed to Step 4.
Note & Disclaimer: Adjustments change the price of an included comp by adding or subtracting value based on varying basic facts. Adjustments require adept knowledge in property values specific to each location. Speak with a broker or office manager if you have additional questions about adjustments.

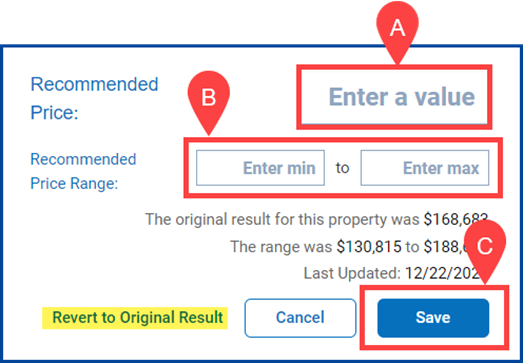
Step 4: Review the result of the comp analysis. If necessary, select Edit to enter a recommended price or price range.

- A. Enter a Recommended Price if desired (not required).
- B. Enter a Recommended Price Range (required).
- C. Click Save to update the result of the comp analysis.
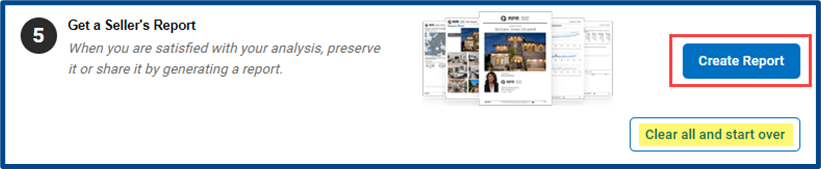
Step 5: Click Create Report to save and share the CMA/Seller’s Report. If you are creating a CMA, this is the last step. If you are creating a Seller’s Report, there are a few more options for customization.
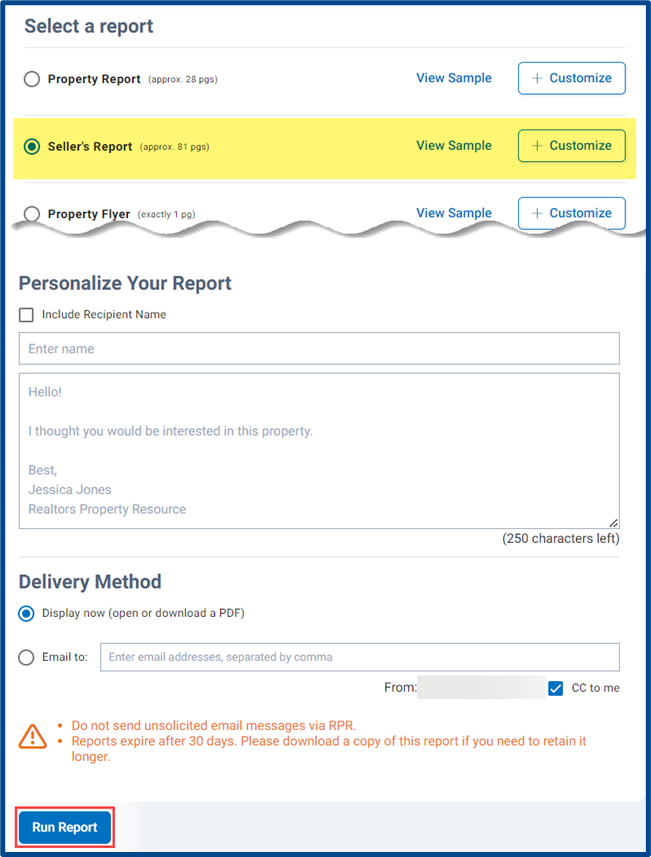
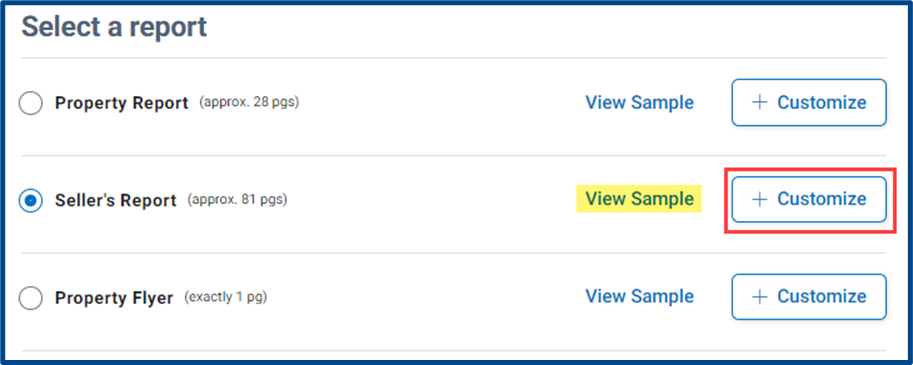
To manage which pages will appear in the Seller’s Report, click Customize.
Note: To view a sample report, click View Sample.
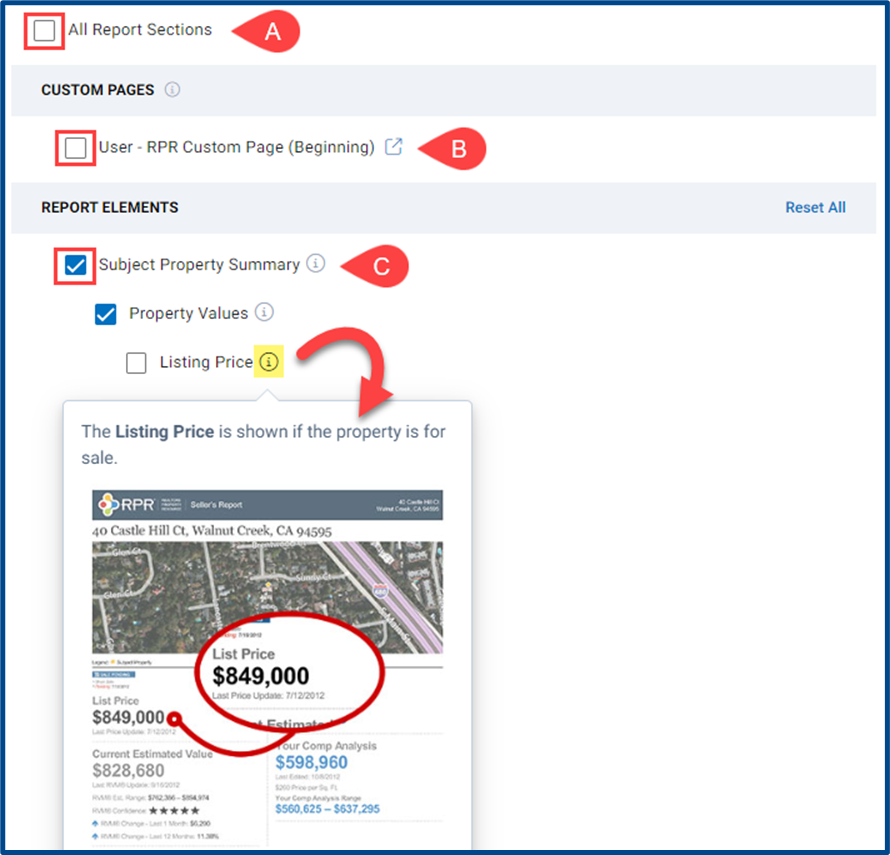
- A. You can opt to include All Report Sections (selected by default).
- B. You also have the option to include uploaded Custom Pages (PDF only).
- C. Select individual Report Elements to include in the report.
Note: Hover your mouse over the info “i” icon to see a page preview.
After deciding which elements to include, you can further customize the report by accessing additional details along the right of the screen.
- A. You may Select Cover Page Elements to Include on the report. By default, all of the elements are included.
- B. Check the box to Show Page Numbers.
- C. To upload a custom PDF, click Manage Custom Pages.

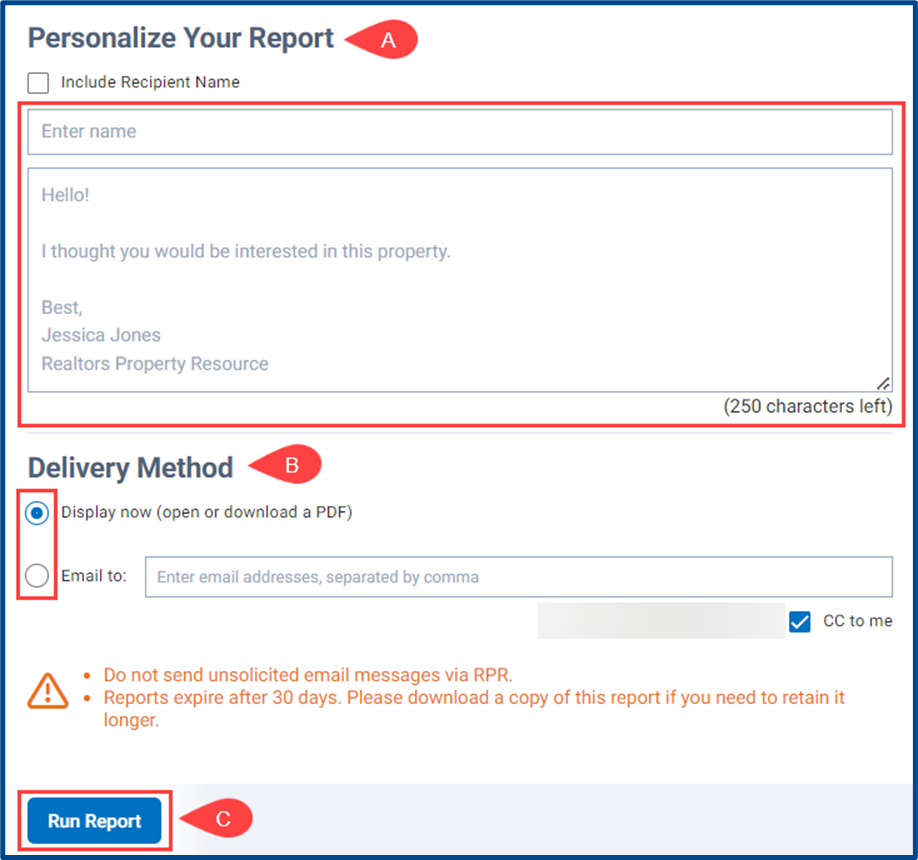
Scroll to the bottom of the screen and add the final elements to the Seller’s Report.
- A. You can personalize the cover page by adding a name and message.
- B. Select the Delivery Method.
- C. Click Run Report to generate the Seller’s Report.
A pop-up will appear when the report is ready to view.

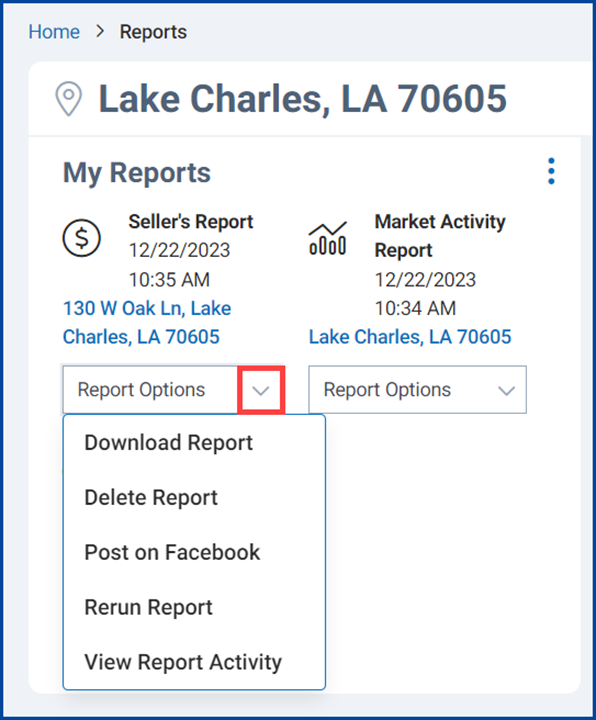
Managing Your Reports #
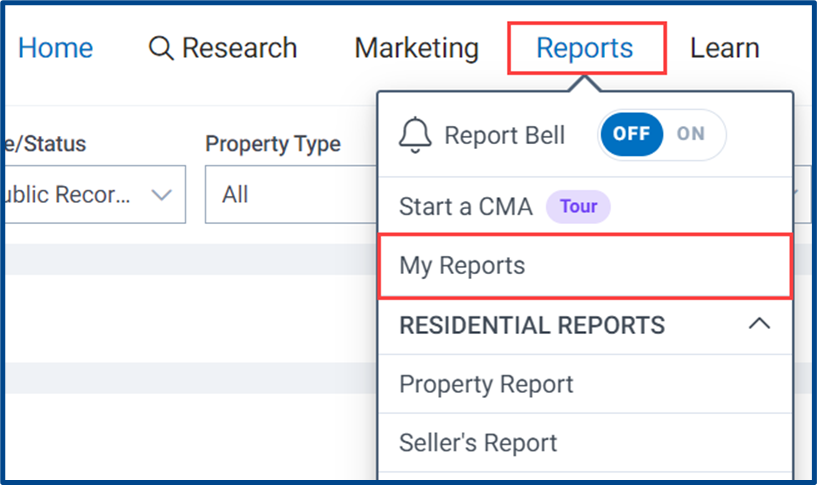
From the top navigation menu, click the Reports taband then select My Reports.
Click the Report Options drop-down arrow to manage a report.
Check out everything RPR has to offer Greater SoutherMLS members by visiting our product landing page.


