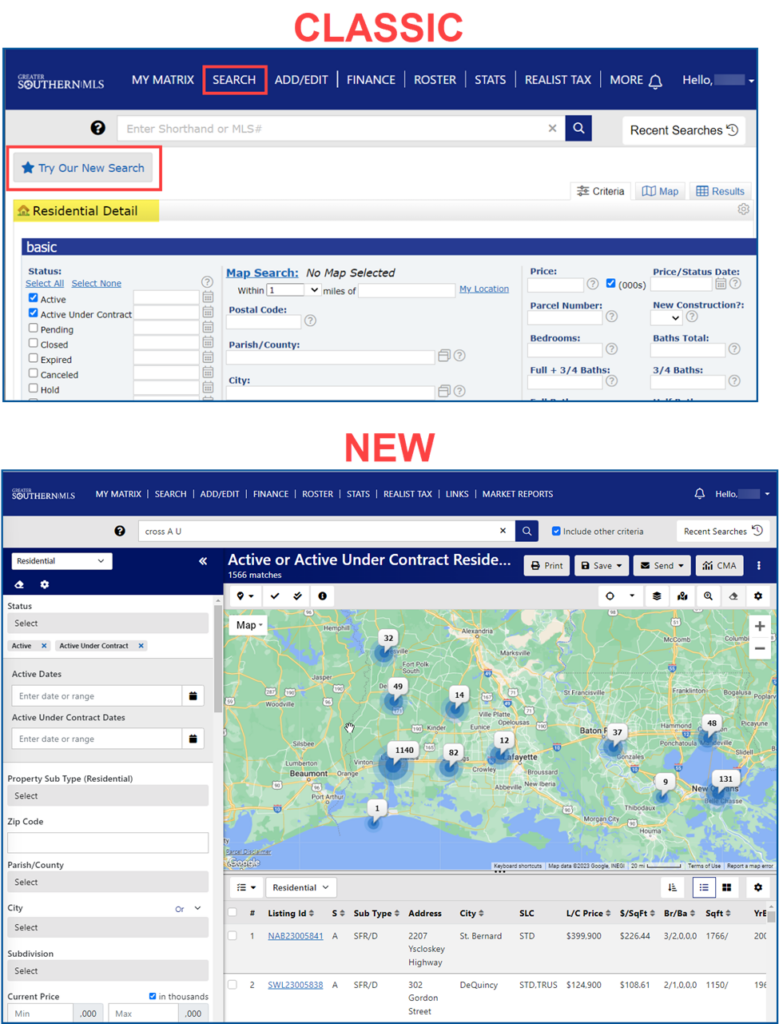
We are pleased to introduce a new search interface available in the Greater Southern MLS Matrix system effective October 3, 2023. This does not replace the classic Matrix search; it is an additional option.
The new search interface is designed to be fully responsive and provide an intuitive and efficient user experience across devices, including mobile phones, tablets, and computers. On large screens such as desktops, the new search features a three-panel design that simultaneously displays your search criteria, map, and results. Mobile-sized screens display a touch-friendly layout.
With the new search interface, users can:
- Fully customize their search criteria and results list formats
- Use the map to define the search area, view different map layers, select properties, and more
- Toggle between the List View and Gallery View in their search results
- View a pop-up summary of the listing with photos and key details when they click on a search result or map marker
To access the new search interface, click on the Search tab, select Residential, and then click on the Try Our New Search button located in the top left corner. Users can switch between the new and classic search at any time.
- The left panel features the most frequently used search fields. You can customize your search fields (add, remove, and change the order) by clicking the gear in the upper left corner. The maximum number of selected fields is 50. When finished, click Save.

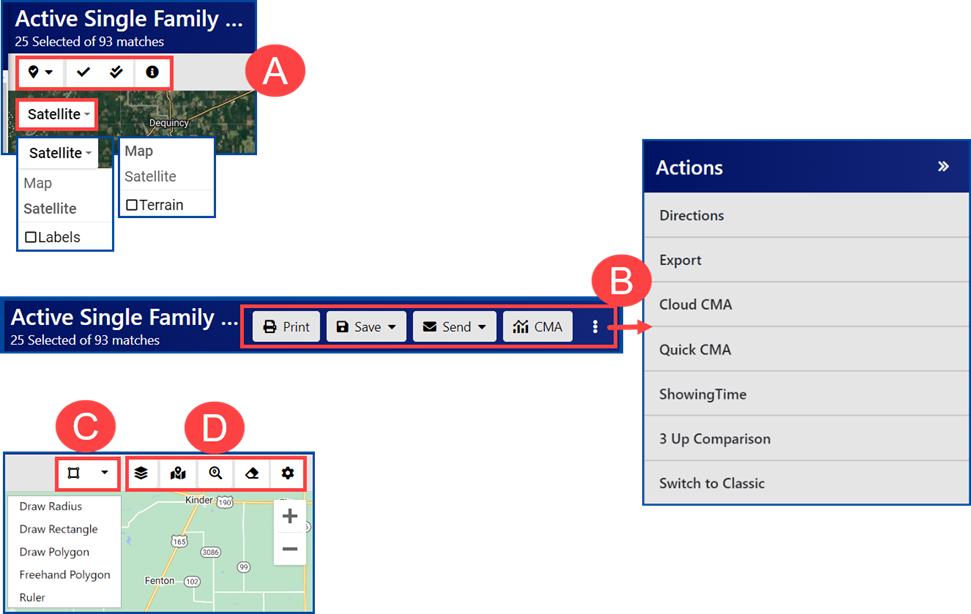
- The Map panel is located at the top. From here, you have several options:
- A. Use your map options to make your selections. From left to right:
- Pin Selection Options: Select All (all of the pins, or flags, on the map) or Select Visible (only the pins that are visible in your current map view). You can also use Clear Selected to start your selection over.
- Ctrl+Click to check pins: When this checkmark is selected, you can “check” any property pin by holding down the control (Ctrl) key on your keyboard and clicking any pins.
- Check all in area (Ctrl + drag): Select this to make a shape around the property pins you want “checked” by holding down the control (Ctrl) key on your keyboard when you click and drag with your mouse cursor.
- Legend: When you click the “i,” a reference key for each color and icon on the map will pop up.
- Use the dropdown menu to choose your view: Map (with the option to check or uncheck Terrain) or Satellite (with the option to check or uncheck Labels).
- B. Options to Print, Save, and Send listings, or to create a CMA. For additional “Actions” click the 3-dot menu.
- C. Use drawing tools, such as a radius, rectangle, polygon, freehand, or the ruler.
- D. From left to right: Enable map Layers, Recenter the map, Jump to Location, Clear all shapes, and Set/Clear Defaults.
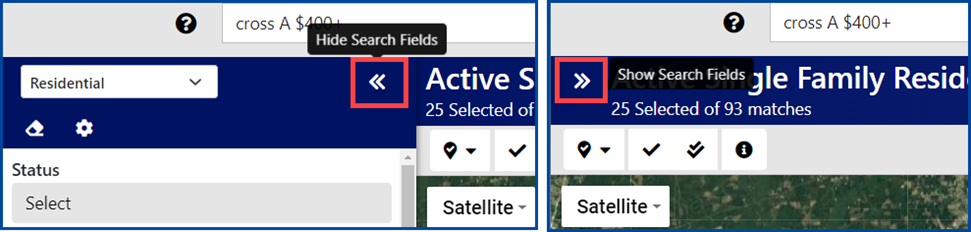
Note: For a larger map display, click the double arrows to Hide Search Fields, and click the arrows again to Show Search Fields.
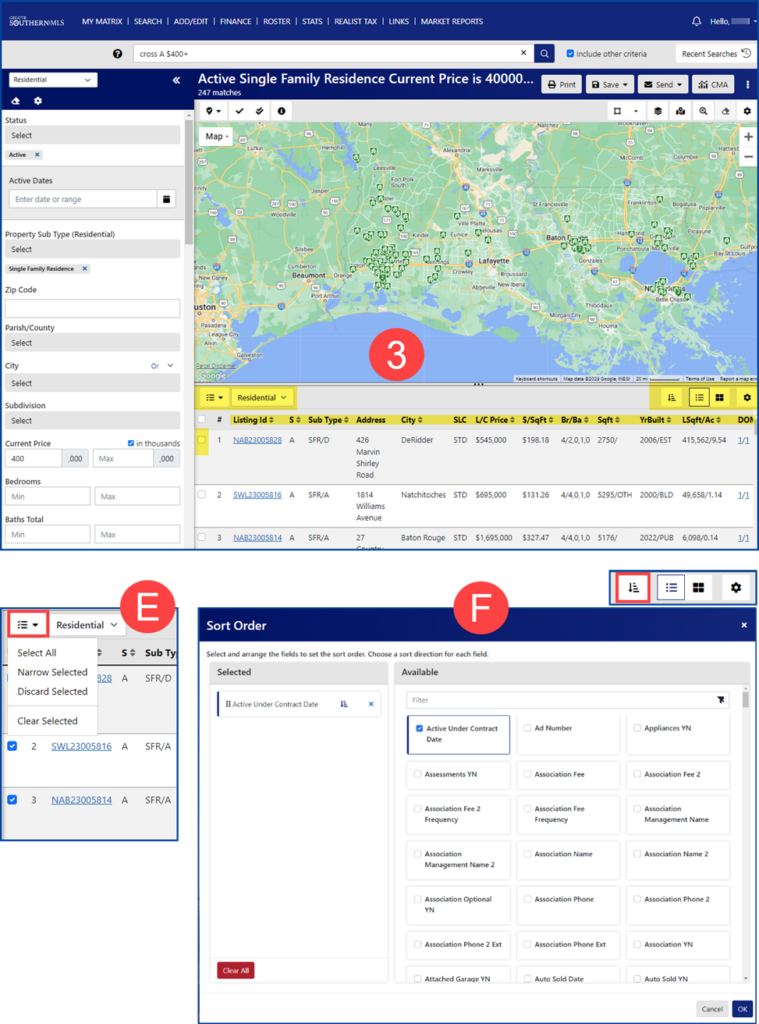
- Your results panel appears at the bottom.
- E. Select listings to Narrow the results or Discard.
- F. Configure your Sort Order. When finished, click OK.
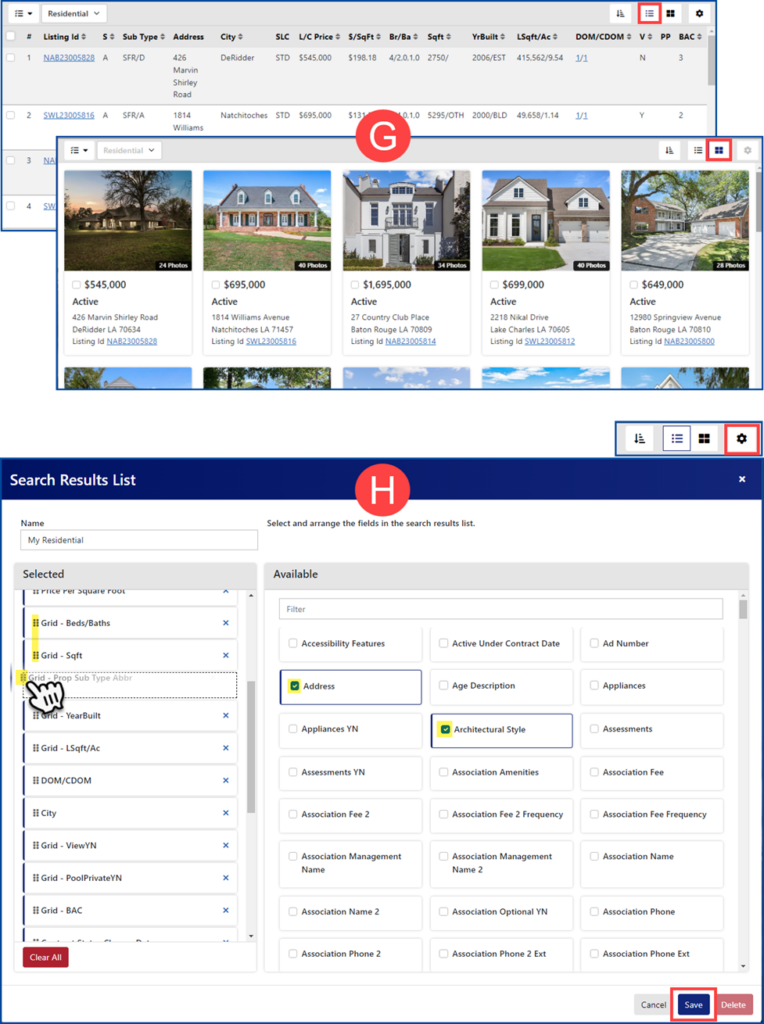
- G. Display the results in a List or Gallery.
- H. In the List view, you can click the gear to customize the results grid, remove and add fields, or change the field order. Click Save to preserve your changes.
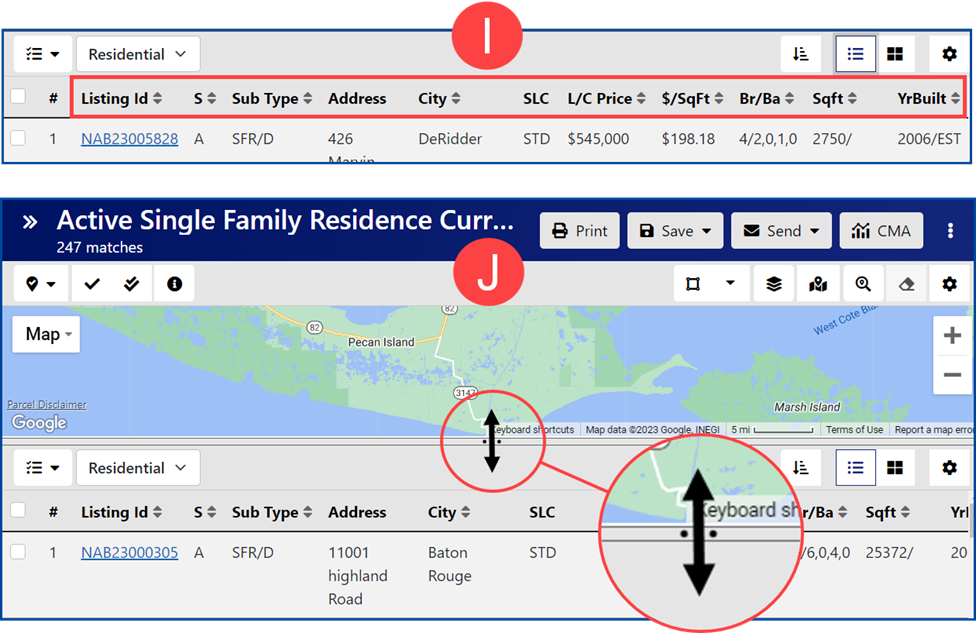
- I. Click the column header to sort results by a specific column.
- J. Click and hold the horizontal 3-dots on the bar dividing the results from the map. Drag upwards to increase or downwards to decrease the results display panel.
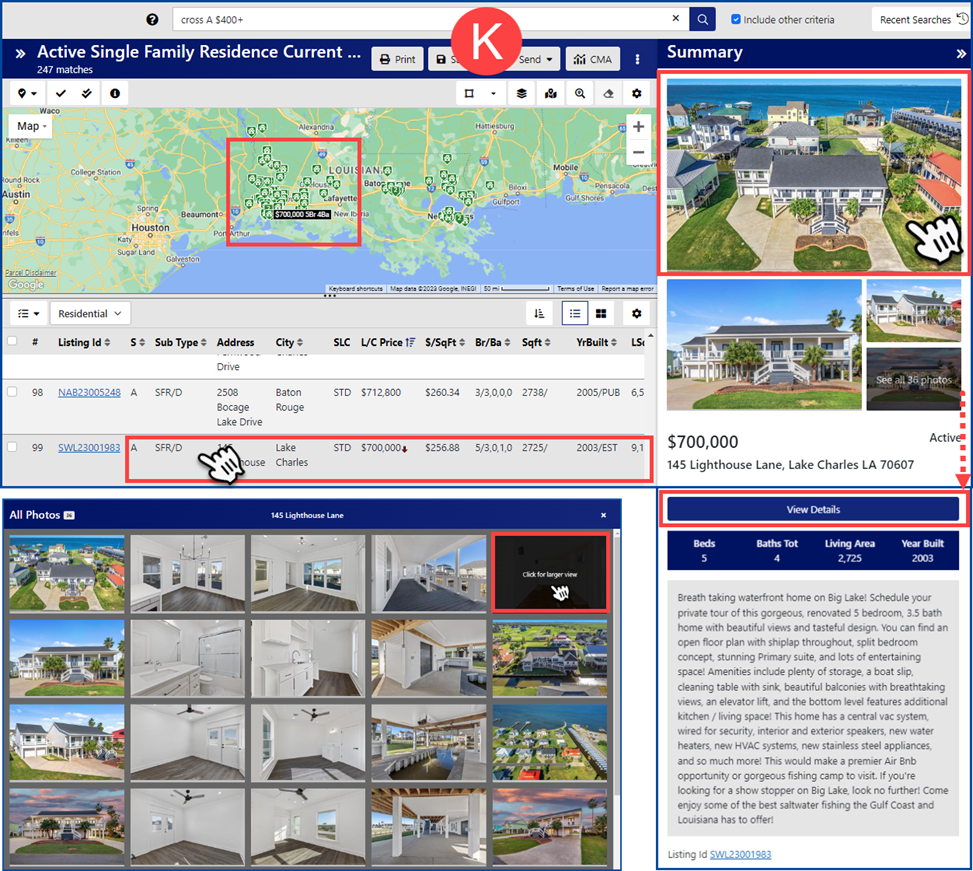
- K. To preview properties, click on the map markers or tap on a property from the list view. A Summary will pop up on the right of your screen. From here, click or tap on an image to view property photos. From the “All Photos” view, click on the image for a larger view. Scroll down the Summary and click on View Details to see a detailed property report.
Click here to view our instructional “How To” video.


