Your GSMLS Matrix system now integrates with RentSpree, effective August 16th, 2022.
We have added the RentSpree Online Tenant Screening field to Residential Lease input forms as a required field for lease listings.
- The field will appear blank by default.
- The Online Screening link will appear in the 360 Property View and Agent Full displays and the Client Portal notification thumbnail view.
- When the listing agent opts in to use RentSpree on their lease listing, they will receive a notification email containing the link potential tenants will use to apply.
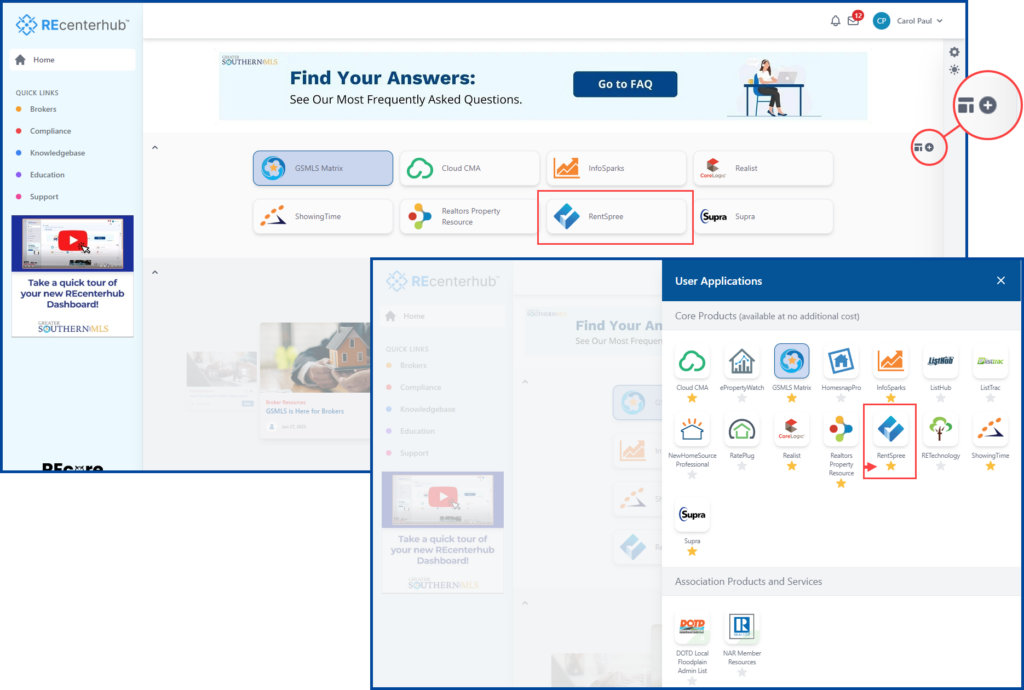
- You will see the RentSpree icon on the GSMLS dashboard when you log in. If the icon is not visible, click the + sign on the right, and click the star below the RentSpree icon to mark it as a favorite.

Note: your dashboard may vary depending on your Association, and may look different from the example above.
How to start using RentSpree on your lease listings #
Matrix Input Form #
Prior to adding your lease listings, make sure to claim your free RentSpree Account HERE!
You will find the RentSpree Online Tenant Screening required field in the Residential Lease input form, under the Land/Leasing tab.
- The field will be blank by default. Select Yes or No.
- If you select Yes, you will receive a unique link in your email that you can share to potential applicants, who can use it to access RentSpree’s screening process. The link will also appear in the 360 Property View and Agent Full displays and the Client Portal notification thumbnail view.
- You may also add the Rent Spree URL and RentSpree YN fields to the Agent 1 line display.


How to add the RentSpree URL or RentSpree YN column(s) #
- Hover your mouse icon over the column header in the gray bar until you see crossed arrows, then click.
- Click Insert Column. You will see a list with all column types.
- In the Search box, type RentSpree and select RentSpree URL and/or RentSpree YN.
- Select the column(s) you want to insert and click Apply. This will add the column(s) to your Agent 1 Line report. Click here for detailed instructions.

Click on the question mark for help.

Sample RentSpree notification email #


